Why Image Compression Matters for Websites and Social Media
Image file size has direct, measurable consequences across three areas:
Website loading speed and SEO
Google uses page loading speed as a ranking factor for search results. Large images are the single most common cause of slow-loading web pages. Google's Core Web Vitals metrics — which directly affect search rankings — are heavily influenced by how quickly the largest visible content element (often an image) loads. A website with properly compressed images scores significantly better on Core Web Vitals than one with uncompressed originals.
For practical context: a webpage with five 2MB images takes approximately 10+ seconds to load on a typical mobile connection. The same page with those images compressed to 200KB each loads in under 2 seconds. Users abandon pages that take more than 3 seconds to load — and Google knows this.
Social media upload quality
Every social media platform recompresses images on upload. Instagram, Facebook, TikTok, and Pinterest all process uploaded images to reduce file sizes for their servers. This recompression reduces quality. The key insight: platforms apply less aggressive recompression to images that are already optimally compressed than to uncompressed originals. Starting with a well-compressed file means the final displayed quality is higher, not lower, than starting with a large uncompressed file.
Storage and transfer
For creators who manage large image libraries, compression reduces storage requirements and speeds up backups, file transfers, and sharing. A folder of 500 product photos that compresses from 2GB to 200MB is meaningfully easier to work with at every stage.
Lossy vs Lossless Compression: What Is the Difference?
There are two fundamentally different compression approaches, and understanding the difference helps you choose the right settings for any use case.
Lossy compression
Lossy compression permanently removes some image data during processing. The removed data represents visual information that the human eye either cannot perceive or perceives so minimally that the difference is not practically noticeable. The result: significantly smaller file sizes with no visible quality difference at moderate compression levels.
JPG is the most common lossy format. A JPG at 80% quality is typically 60–80% smaller than the same image at 100% quality, with no visible difference on a screen at normal viewing distance and size. Lossy compression is appropriate for photographs and complex images intended for web or social media display.
The drawback of lossy compression: it is irreversible. Every time you compress a JPG, you lose a small amount of data permanently. Saving a JPG, editing it, and saving again repeatedly degrades quality cumulatively — the 'generation loss' problem. Always keep original uncompressed files and compress fresh copies for each use.
Lossless compression
Lossless compression reduces file size without removing any image data. The mathematical structure of the image data is reorganised more efficiently, but no information is discarded. Decompressing a losslessly compressed image produces a pixel-for-pixel identical result to the original.
PNG uses lossless compression by default. WebP can use either lossy or lossless compression. Lossless compression produces smaller files than uncompressed formats but larger files than lossy compression. It is appropriate when you need pixel-perfect quality — screenshots, graphics with sharp text, or images that will be used as source files for further editing.
Image Formats: Which to Use When
Choosing the right format before compressing makes a significant difference to both file size and quality:
JPG — for photographs
JPG is the standard format for photographs and complex images with millions of colors and gradients. It compresses well with lossy compression, producing small files with good quality. JPG does not support transparency. Use JPG for social media photos, website photography, product images, and any image where small file size matters more than pixel-perfect accuracy.
PNG — for graphics and images requiring transparency
PNG supports transparency (the checkerboard background you see in design tools). Use PNG for logos, icons, screenshots, text overlays, and any image that needs to be placed on different backgrounds without a white or colored box around it. PNG files are typically larger than equivalent JPGs because they use lossless compression. If transparency is not needed, JPG is usually a better choice for photographs.
WebP — the modern standard
WebP, developed by Google, provides superior compression for both photographs and graphics, achieving 25–35% smaller file sizes than equivalent JPG or PNG images at the same quality level. WebP supports both transparency and animation. All major browsers and social platforms support WebP in 2026, making it the best choice for new website images where maximum compression efficiency matters.
Convert between formats easily: WebP to JPG Converter or PNG to JPG Converter for format conversion, and Image Compressor for compressing any format.
How to Compress Images: Step-by-Step
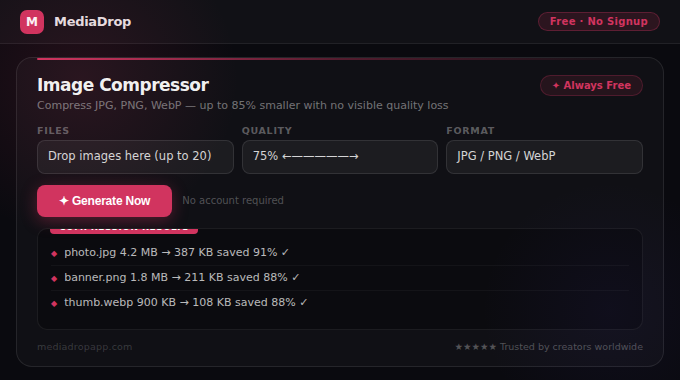
Use MediaDrop's free Image Compressor to compress any JPG, PNG, or WebP image directly in your browser — no software installation, no signup, and your image never leaves your device.
- Go to Image Compressor.
- Upload your image by clicking the upload area or dragging and dropping. Maximum file size: 10MB.
- Select your compression quality level — for most web and social media uses, Medium (70–80% quality) is the optimal balance of quality and file size.
- Click Compress.
- Preview the result — the compressed image is shown alongside the original with file size comparison.
- If the quality looks good, click Download to save the compressed image.
Compression quality guidelines by use case
- Website photography: 70–80% quality. Targets under 150–200KB per image for typical blog or product photos.
- Social media uploads: 80–85% quality. Platforms recompress anyway, so starting with well-compressed files gives the best final result.
- Thumbnails and small images: 75–80% quality. At small display sizes, aggressive compression is invisible.
- Print-bound images: Do not compress for print. Keep original high-resolution files for print use — compression is for digital display only.
- Product images for e-commerce: 80–85% quality. Customers scrutinise product images closely, so balance quality and load speed carefully.
How Much Can You Actually Compress?
Typical compression results from a modern image compressor at 75–80% quality:
- A smartphone photo (5–8MB) compresses to 300–600KB — a reduction of 85–95%
- A DSLR photograph (15–25MB) compresses to 1–3MB — still suitable for high-quality web use
- A 2MB website banner image compresses to 150–300KB
- A 1MB product photo compresses to 80–150KB
These reductions are achieved with no visible quality difference on screen. The compressed versions look identical to originals on monitors, phones, and tablets at normal viewing sizes because the data that is removed during compression represents information the human visual system cannot practically perceive.
The only situation where you might notice quality difference from 75–80% compression: large-format printing (poster sizes, billboards) where images are viewed very close to the surface, or pixel-level inspection of specific image areas in a photo editing tool.
Conclusion
Image compression is one of those rare technical tasks that is genuinely simple in practice: upload your image, set medium quality, download the compressed result. The returns — faster website loading, better SEO scores, better social media display quality, and reduced storage requirements — are disproportionate to the effort involved.
The single most important habit: compress every image before uploading to your website or social media. Use Image Compressor to process images directly in your browser with no installation required. Combine with Social Image Resizer to get images to the correct dimensions for each platform before compressing.